
Blue Ox Base Plate Kit - Removable Arms


To see if this custom-fit item will work for you please tell us what vehicle you'll use it with.


Get a secure, nearly invisible connection for flat towing! This heavy-duty Blue Ox base plate features removable arms, easy bolt-on installation, and integrated safety chain attachments for added security.
Designed for a strong and seamless integration, this base plate kit provides a secure attachment point for your tow bar, ensuring a safe and stable flat towing experience. Its precision-fit design allows for easy installation with no welding required.
Keep your vehicle looking clean when not towing. The removable bracket arms maintain a nearly invisible appearance, so there's no bulky hardware left behind.
Constructed from high-strength steel and finished with a durable powder coat, this base plate is built to handle the rigors of the road, providing superior resistance to rust and corrosion.
Comes with all necessary hardware for a straightforward bolt-on installation. No welding required, making it easier to set up and get on the road.
Works with Blue Ox tow bars for a smooth, hassle-free connection. Engineered for reliability, ensuring your vehicle tracks effortlessly behind your motorhome.
Integrated safety chain attachment points provide an extra layer of security, ensuring compliance with towing regulations.
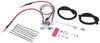
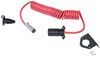
No flat towing setup is complete without integrating additional essentials. This base plate kit has integrated mounting points to easily attach an electrical connector plug bracket (sold separately). This feature makes it simple to integrate your tow bar wiring and supplemental braking systems, streamlining your towing configuration.

California residents: click here
Videos are provided as a guide only. Refer to manufacturer installation instructions and specs for complete information.
Hello neighbors, it's Brad here from etrailer and today we are taking a look and installing the Blue Ox Base Plate on a 2026 Chevrolet Tahoe. Choosing a base plate for your flat towed vehicle is an important decision because if you're doing the install yourself, a lot of times getting the right one will really make a world of difference on how the install goes as well as how it's gonna look with the finished product. And this one overall, I'm really impressed because it looks fantastic when it's done. It gives you mounting points not only for your six pull, for your diode wiring, but also for your breakaway switch, which seems like a small thing, but to not have to fabricate to get everything to work properly really makes this a great option. And I think having it in place here just in normal driving mode, I think it does a really good job of not taking away completely from the look of the vehicle. Sometimes once you get a flat tow set up on a car, it really takes away from the aesthetic, whereas this one does a great job of keeping our arms, the receptacles almost flush and nice and clean looking.
And then, also utilizing the openings in the grill for our safety chain loops, the breakaway switch bracket, as well as the mount for our diode wiring. So, let's take a look at the base plate. This is gonna be a foundation for your flat tow. This is where everything hooks up and the base plate attaches to the frame of the vehicle. So, our arms, these are gonna be out when normal driving, but when you are ready to flat tow, it's super easy.
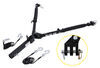
You'll just slide these in, give 1/4 turn, those will snap in place and then you can hook up your tow bar. To remove it, it's equally as easy. You just pull this, give it a twist, pops out nice and easy. They also give you caps that you can put in place. That way as you're normally driving, you know you're keeping grime from building up in there.
And that way this goes in smooth every single time. So, now that we've taken a closer look at what it looks like installed, let's show you how to hook it up when you are ready to flat tow. And something that I'll point out is we're gonna be using a Blue Ox tow bar today, and this will work directly obviously with your Blue Ox Base Plate. But if you do have a different brand of tow bar or you're looking at a different tow bar, not to worry, you can always make these work. You'll simply get adapters that are designed for the Blue Ox Base Plate.
You can pick those up separately or a lot of times you can pick up the tow bar with those already included, but that is gonna make it to where you can hook this up. So, we'll pin up this side. And when hooking up your flat tow components, I always tell people, just look at your base plate and theoretically you should have all of the connections you need. Just make sure that everything has a home. So, once you get your tow bar on, we also have our safety cables, which again, I do like how far these stick out. In a good way they're not too excessive yet super easy to hook up. We can get our diode wiring plugged in. We will get our breakaway switched attached and then we'll get this side hooked up. Now, something that's gonna be important and that you're gonna want to check on your RV is gonna be the height. And the reason why is you want your tow bar as level as possible. So, measuring from the ground to the middle of our arm, this one comes in right at about 17 1/2 inches. And so, what you need to do before hooking everything up is measure from the ground to the center of your hitch pin hole. And that way you can determine the difference in height. Now, 3 inches is kind of the sweet spot or the window you're looking for. You want that height within that 3 inch plane to make sure everything's nice and level and make a safe towing down the road. On ours today, it falls into that window, so we're good. But if yours is quite a bit different, you may need to pick up a high-low adapter to get everything nice and straight. So, now we've covered some of the features and what it looks like when it's installed, but you may be wondering what does it take to get it installed And I'll be completely honest, most base plates are gonna require a fascia coming off and this one's no different. So, it's not super easy to get everything removed and taken apart. But overall, I think it's worth it for the finished product, it is gonna involve some drilling into the frame and quite a bit of trimming of plastics on your vehicle as far as stuff behind it. But overall, the front fascia, there's not a whole lot to trim, which makes this a really great option in my eyes. So, I'll walk you through step by step on how to get this base plate installed. And I do recommend anytime you're doing your base plate, while you have the fascia off, you're gonna really wanna get all the rest of your components set up at the same time. That way you can route everything, mount everything up nice and clean. Now, with that being said, if you watch that video, I'm hoping that you're gonna try this at home, but I also understand if this is something beyond your scope. If you've never set up a flat tow before and you say, you know what I wanna flat tow my Tahoe, but I'm afraid of the install, I don't have the time, the place, the tools or even the want to do it, I completely understand. But if that's the case and you still need to get your vehicle flat towed, you can get this all set up by finding someone close to you using our dealer locator. You can put in your zip code, you'll find a list of shops close to you and that way they can get this all installed and you can be out there flat towing in no time. But, for you DIYres, they're gonna be doing this yourself, Follow along, let's get your base plate installed. Now, jumping into the installation, a few things that I'd recommend doing. You're gonna want a nice organized spot to keep all of your hardware. We're gonna be removing a lot of things including the fascia and all the pieces in between. And having all that hardware when you go to reinstall everything in a nice organized spot will really just make your life a lot easier. So, have that set up. Also, you're gonna want a place to keep your fascia because chances are you're doing the rest of your flat tow stuff alongside with it. So, with that being said, we'll grab our trim panel tool and we'll open up our hood. The first thing we're gonna remove is gonna be this plastic shroud. So, there's gonna be plastic push pins come just across the top here. And so, trim panel tool's really nice and helpful here. You just go into the slot, raise up that center section and if you can, you should be able to pull this up and maybe you'll get the whole thing to come up. If not, you can pry on the bottom and if it does separate, just make sure you have both pieces. So, we'll go through, get those all removed. Now, once you get all the plastic push pins removed before removing this, something that we need to do is we have a hood latch release extension. So, this just bolts up to your hood latch to make it easier to reach. And there's two T15 Torx bits. So, we're gonna take that out and that'll make it a lot easier get this plastic slid out. (wrench whirring) And with that slid out, now you can take this, raise it up, and for now we'll just set this aside. So, with that cover removed, that will expose the 10 millimeter bolts that go atop across the top here. So, we're gonna get those removed. There's a total of six of them. (wrench whirring) Next thing we'll need is gonna be a T15 Torx bit. And it's gonna get a little bit tight here, so I'll be using just a small 1/4 inch ratchet that we have with an extension. If you don't have one of these and you're struggling to be able to get to these screws, what you can do is start the car for a second, turn the wheels one way or the other. That should open it up, making it a little bit easier for you. And the screws that we're gonna be tackling, there's six of them total. So, as we go along the outside edge we have one, two, three, four, and then there's one up here that's five. There's also gonna be one that's tucked kind of up here, so that makes for a total of six. So, we'll go through and get these all removed. So, with the fender liner loosened up with that hardware taken out, the next thing we wanna do is kind of pull it back. So, if you can get your hands behind it, what we're looking to do is peel this back and that's gonna give us access to the hardware that attaches the fascia and our front fender. So, I'm pulling this down, just to kind of hold this out here, what we're gonna be looking for is along this seam there is going to be some 7 millimeter screws, they face down towards the front fascia. So, it's gonna be a little bit tight here, but with our ratchet I'm gonna reach in there and get those screws removed. And these are pretty small, so just reach your hand up. There's one right here, there's one in the center and one that's up here. So, I've found that I have a 1/4 wrench ratchet with a swivel head that gives me a little bit of rotation. A lot of times once you get these at least loosened up, a lot of it you can get with the your hands for the rest of it. But it can be a little bit tricky here, so just take your time. So, they're pretty long. So, again, just take your time and we'll have three of 'em here. And then, we're just gonna repeat the exact same process on the other side. Now, something that I found and might be helpful is you don't technically need to remove them completely. Loosening it up will loosen up the bracket that kind of holds all of this in place to where it snaps in. So, I still have the screw attached up front here, but I was able to pop my bumper out. Now, it does look like you will need to remove the one closest, but as far as the two up towards the front of the vehicle, I would loosen it up so it's easier to pop that out. But honestly, I might leave it like this, I don't wanna completely remove it. It might actually make it more difficult when we put everything back. So, just something to as you're doing this, you don't need to remove all of 'em. So, just a little helpful tip there. With the fender liner pulled back, we are also going to be removing a 10 millimeter bolt. So, it's kind of tough to see it's up front. But if you look for the bracing on the frame, this circle here right down below this tab, that's the one that we need to remove and we're gonna be doing that on both sides. So, I'm just gonna sneak my ratchet in here and get that taken out. Now, we're gonna head underneath the fascia with a 7 millimeter socket and we're gonna be going along this lower kind of underbody panel and we will have eight screws on the panel. But something that I noticed is you are gonna want to take a look at where this fender liner is and it's still attached to this front air dam or mud flap area. So, not only are we gonna get the eight off of this panel, but we're also gonna get this one that's just right off of there. And that's gonna help separate everything. (wrench whirring) So, at this point, you might have noticed I put some painters tape along the fascia and fender and that's just really gonna help if we have any clear coat rubbing, it should prevent any chips or scratches. And to get your fascia removed, what I recommend is having an extra set of hands because it's not that it's particularly heavy, but it is kind of a. Well it's awkward. And also we have electrical connections that we're gonna need to separate. Those are gonna be on the passenger side, I think I know which ones they are. But to be completely honest, once I start taking the fascia off, I'll know exactly which ones need to be unhooked and I'll let you know. But you should be able to access those behind the fender liner here. So, once you watch this, if you see which ones I unhook, you should be able to do that now. But to get this pulled off, grab an extra set of hands and this side should pop out since we loosened up that bracket here, this should pop out and then pretty much along the entire way there's gonna be clips. But we do need to be careful here because as we go across on the top where we remove the 10 millimeter bolts, you'll see there's just a little stop here. So, we wanna lift this plastic up and over. And there's also probably some alignment tabs on these. Looks like maybe this one here, maybe not, maybe it's just on both sides. But our goal is to kind of keep this separated. So, pop off both sides here and put a little bit of pressure back until it kind of wedges like this so it won't snap back in place. And I'll pop off the other side. And then, once we start getting both of those ends loose and this is kind of set up, we'll just start working our way towards the middle and we should be able to pop it off. But again, we have those electrical connections so just be careful when you start to pull the fascia back. Now, I started popping this off, I've Scott here to help me. He's kind of holding up our fascia, but you'll see where the clips are, these green ones. So, we have 'em in between our turn signals and our headlights and it just kind of goes around the entire thing even down here. So, we really wanna be careful. So, I do recommend grabbing a trim panel tool and just really gently just kind of wedging behind there. So, if you kind of have the one side loose and Scott's pulling that back for me, that's really gonna help keep that pressure to where as I kind of work my way with this, you don't have to put a ton of pressure. And as we just kind of peel it back, it's starting to unhook. But we do need to make sure that all of them are unlatched. So, just take your time here. And with that all done, I mentioned those electrical connections, these are the ones we're gonna wanna tackle. So, they're kind of tucked here, but you definitely can access these through the fender well. So, if you wanted to do these first, what you'll do is that red tab will need to come off, pull that down, they're not be removed but pull that down, that's a locking tab. And then, from here, we'll push down and get this separated. So, that's the one. And then, the other one's gonna be this large harness. So, same thing, pull that red tab and then these, this whole sleeve will kind of go back and that will undo it. So, if you're looking to undo those before you pull it off, it's gonna be those two plugs. And with this removed, we'll set it aside. Now, we're gonna be doing some trimming and in order for our base plate to go in place here, unfortunately, from the factory, we got a lot of things that are gonna be in the way. So, at this point you might have noticed in the instruction manual that this covers not only the gasoline version but also the diesel version. Ours is the gasoline version. So, if yours is the diesel, follow that path. It may be very similar on certain things, but certain things may be very different. I would imagine an intercooler is probably here on the diesel, so that's probably why it's different. But what we'll do is this brace that we have, we're gonna be cutting it right about here about in line with the bumper beam. So, if you see this oval slot, if you cut right there, we're gonna be doing that on both sides. And then, underneath where it attaches to the frame, there's gonna be a 10 millimeter bolt on each side. So, this whole thing's gonna come down. Now, as far as cutting the plastic, you can use whatever you have handy. So, reciprocating saw, Dremel, whatever you have, I like using my multi-tool, it works really well. So, I'll cut this first (saw whirring) and then we'll grab our 10 mil socket. And then under here, we'll just get those removed on both sides. Now, while I'm doing this something I will tell you just from what I'm learning from experiences, GM uses a undercoating on their frame and it's a tar like substance. And I'll be completely honest here, you get it on your hands as you're kind of working around this, it is not fun to get off. So, if you're someone that wants to keep their hands clean, I would highly recommend getting some gloves as you kind of work around the frame. Just something that I've learned with this stuff. Now, with that cut out, we don't need this anymore so we can discard it. Now, for the next step, I kind of looked ahead and I wanted to see why they did it. So, we have this brace here that goes in front of our shutters and what they want you to do is remove the 10 millimeter bolt that's down here, and then if you kinda go behind the headlight, there's a nut here and that one you're just gonna loosen. And I kind of wondered why because eventually we'll be pulling off this bumper beam and we'll be working on the ACC. I think just loosening this and having that lower one is gonna allow us to raise this up for when we pull everything out. So, you might be able to omit it, but at this point I'll just follow the instructions. They did it for a reason. So, with a 10 mil, we'll remove that lower one. We're gonna be doing this on both sides. So, we'll get this taken out. I'm gonna swap to a short 10 instead of a deep. And I think getting this one out shouldn't be a problem. And as far as the nut goes, it's a little tight here, but a 1/4 inch ratchet, I should be able to get that loosened up. Next thing we're gonna attack is going to be the ACC bracket, which is adaptive cruise control. And we're gonna have three 10 millimeter bolts that are on the bumper beam. So, we'll get this removed. Now, be careful with these, you don't wanna drop 'em, you don't want any major impact on these. So, we're gonna leave it on the bracket and we're gonna just kind of let it hang and that way we can move it out of the way of the base plate. But to get this taken off, it'll just be these three 10 mills. (wrench whirring) Now, we are gonna be pulling off our bumper beam completely. So, what we're gonna wanna do is pop off the plastic Christmas trees as they say that are just holding on this wire loom to the bumper beam. And with that all undone, we don't wanna unhook it as far as electrical connections. But for now, I'm just gonna set this up here. And that brings me to my next point of we are gonna be removing our bumper beam next. So, we'll be tackling the bolts that are located right here. So, I'll grab my Impact and we can start taking those off. Now, these are gonna be a 15 millimeter socket to get them removed and I'll be using a 1/2 Impact. Some of these have thread lock on it from the factory so they can be a little tight (wrench whirring). Nothing that an Impact can't loosen up. And we are gonna be reinstalling this later. So, we're just gonna set it aside once we get it removed. (wrench whirring) Now, you will need to raise up the beam. It's got tabs that kind of interlock this in so that's why we loosen this up. I'm starting to see that now. So, I don't think we can omit not having this loose 'cause these tabs go directly down. So, I'm gonna try to get this pride off and then I'll show you what they look like. Now, I got this taken off, this is that tab and it just kind of slides over and hooks in. So, I could see the tab. It's just really, really tight against this. So, move this up as much as you can and it is gonna kind of wedge against this plastic. So, just kind of take your time here but with a little force I got the first one off. Once you get that popped off, this one kind of just slides off the side. So, we'll set this aside for now. Now, we're getting ready to put our base plate up and we're really gonna just use it as a template for a little bit and they recommend having clamps to be able to drill out the holes but have it clamped in place. Something that I'll suggest doing first to make it a little bit easier on you is just grab two bolts from your kit. We're gonna use those as kind of just to hold this in place so we can get it all lined up and then clamp it. So, the passenger side and the driver's side of where these tabs go is different. So, the passenger side has three holes that theoretically should line up with our base plate. So, when we raise this up, I'm just gonna get a bolt started. And really any of these, assuming, yeah, the bolt fits in all of them. So, putting that bolt in, it's just gonna kind of hold that there. Now, on the other side there's one hole that we can align, that's where we will put our other bolt. So, that's gonna be the one down here, but this one is actually a little tight. I can just get the bolt started or kind of threaded in, but the other two holes aren't gonna be there. So, that's where we're gonna use this to figure out exactly where we need to drill. So, with that being said, I'm gonna grab the base plate and slide this up and it's fairly kind of tight here, it's not too terribly bad, but I'll pass this through and get my other one in as well, and that's gonna at least hold it there. Now, obviously there's a little bit of wiggle here, but that way we can go grab our C clamp or vice grips or something to clamp this all down. Now, what I'm gonna do is on our passenger side, since all those holes line up, I'm gonna put the bolts in there just for now to kind of hold that in place. I have a set of vice grips here. I also have a clamp, and I'm gonna clamp. I'll be clamping this down, but as we do this, we wanna make sure that all of this hardware's somewhat lined up to where it's gonna be able to pass in there. So, even though these are passed in, you can see it's still got a lot of wiggle room here. So, what I'll try to do is get this all lined up and we want this bottom to be pretty well flush here. So, I'll kind of hold this up, get my clamp in place and then I'll double check the other side and clamp that down as well. And when you have that clamp down, double check, make sure that this is sitting nice and flush. You can see mine started to droop a little bit. You want this as squared up as possible, so double check each side, make sure that you're happy with the way everything's sitting. And then, from there we're gonna get these holes drilled out. So, here and here. Now, also on the bottom we have holes. So, that's something that we need to take into account as well. And so, we'll be drilling all of those out with a 1/2 inch drill bit. So, we'll get the two holes here, the bottom holes, we do have the bottom holes on this one, but we'll get that all drilled out right now. So, yeah, go ahead, get your 1/2 inch drill bit and start working on those. Now, as far as getting this all drilled out, I'll say I would highly recommend doing the bottom first because that's really gonna set the tone, getting those drilled out and then we can loosely get them bolted up. But that way it's not gonna shift on us and it's also not gonna change on the side because if we did the side ones and then drew it up, it's possible those holes will be a little bit off. Whereas if we do the bottoms first, that's really gonna set the tone for the side ones. Now, it may also cause these ones to not align, but the main thing is is we want this nice and flush. So, what I'm gonna do is I drilled out my holes and you are drilling through a frame. So, it's not exactly easy. If I can recommend, just be very careful. But if you use a floor jack as kind of a drill press to drill up into the frame, that'll save you a lot of headache doing it. But otherwise, just have a really sharp 1/2 inch bit and just kind of work those. So, with those ones drilled out, what we'll do is we're gonna grab our bolts and put a split washer on there. We're also gonna put some red lock tight on here and that's just gonna ensure over the lifespan of our base plate as we hit bumps going down the road, it's not gonna loosen up. Not that I think these will, but it's just a nice little peace of mind here. So, I've got those threads covered here and then we're gonna be using whiz nuts to get these bolted up. So, we'll just feed this up and I'll start at this back one here. And your whiz nut is just a handle that holds on to the nut there so it's easy to tighten, makes it easier for getting them started here. So, I'll get this one threaded on, I'm gonna do this one as well. And then, I'm gonna repeat on the other side and get it to this point. So, once we have this snug down on both sides just by hand, I am gonna start tightening this and torquing it down and that way again it's all drawn up. And then, those side ones should be nice and easy and squared up exactly where we need 'em. So, get your other side set up like this. Now, for these whiz nuts or handle nuts or whatever you wanna call them, I would recommend using hand tools. If you use an Impact, it's possible it'll pop that off. And our goal is to snug this down, it is a serrated nut, so once you get tension on it, it should hold that in place. So, it's a three quarter inch socket to snug it down. And then, the torque settings, you'll find in the instruction manual, there's a chart for all the different sizes of hardware. So, just refer to this 1/2 inch bolt, grade five. And so, once snug down, we'll just grab our torque wrench and get these torque down. Now once those are torqued down, we'll get these handles out of the way. So, it's just a small little tack weld on there. So, really if you just twist these around, they should pop off. And now, that it's all flush against the frame, you can see that our bolts are a little bit wonky here, so we are gonna need to enlarge these. Now, these are kind of stuck in there, I probably should have taken them out in hindsight, but I should be able to thread those out and we're gonna see that we're gonna need to enlarge those holes. So, even though these do line up, it's pretty close, we do want these to be straight so they're not sitting at an angle. So, at this point, any of the holes where our bolts pass through, we're gonna make sure that we drill out and it's gonna be the same process, same hardware with whiz nuts. So, once we get those holes on the side drilled bolts pass through, lock tight whiz nuts, all tighten and torque, we'll catch back up. I got everything torqued down and something that I would do different if I could do it again, would be before really snugging these down, once you have those holes drilled out, you should be pretty well lined up and you gotta enlarge those holes anyway, that would be a great time to pull those bolts out. I found out the hard way. Luckily I was able to source new hardware for ours. But to prevent you from having to do the same thing, again, once you start drawing this up, pull those bolts out so they don't get kind of stuck at an angle. But once you have all your hardware in place, you've tightened and torqued it all down, we can start by putting our bumper beam back in place. So, we'll slide that back up and get that bolted up. Now, once the bumper beam's in and you've tightened that down, don't forget to get those 10 millimeter, the bolt and the nut tightened down on this brace. And then, something that you'll notice in your kit is gonna be these safety cables with quick links. And this is gonna just be a last line of defense. If all of this hardware was to rip out of your frame, you still want this gonna. To be attached to your vehicle so it's not separated. And what we'll do is we're gonna use this hole for our quick link, and this is gonna wrap around the frame of the vehicle and also around the base plate. So, that way this is gonna keep it all attached. So, the way that I'm gonna do this is if you route it up through the hole here in the frame and then kind of right below our safety chain loop here, I think that's gonna be a good spot to where we should be able to get these to be close enough to quick link up to that hole. Now, this isn't a perfect way to do it, that it's really kind of whichever way works best for you that you're happy with, but the main thing is, is keeping it outta the way of anything moving, which in this engine bay, I'm not too concerned about anything. So, once we loop that together, we'll just tighten down our quick link. Now, everything on the base plate side is pretty well done. Now, we are gonna get the rest of our flat tow components mounted up to that before putting our fascia on, but now's a good time while I have my fascia aside to get this prepped. We are gonna be doing some trimming, but before we do that we need to remove the panel that's on the backside. So, here's the grill, this is the lower section here, you can see that pretty clearly. But this inner panel will come out and that's gonna be where our base plate goes through. So, in order to get this removed, we have three screws on each side. Those look to be a 7 millimeter. So, we'll get those taken off first. (wrench whirring) And then, with those out, the next thing that we're gonna attack are gonna be these clips, and these just kind of snap in. So, what you can do is use a either a trim tool or a flathead and just push in on the tab and then you should be able to get this to pop out pretty easily. And then, we also have some clips here, which on this one, let's see, that looks like we gotta lift these tabs up. So, I'll just pry these and it should allow this to slide out just like that. So, again, this is not gonna be reinstalled, but this is gonna open it up to where our arms and all of our components are gonna poke through so you can dispose of this as well as that hardware. So, I got all of my components mounted up and at this point we're gonna wanna mock up our fascia. Now, they tell you where to cut. A lot of times I like to mock it up so we get an actual realization of what we have there and we can clean it up as much as possible, get nice clean cuts. So, the cool thing is the kind of hooks here, if we can kind of just hook this front on there. Obviously the front's not gonna draw in because we're gonna probably be making contact with stuff. So, we'll kind of guide this in. And what I like to do is as we draw this in, we'll see where it starts to make contact with things and then we can cut as necessary. So, as I kind of slid this into place, there's a few spots that get pretty tight. So, this slide right next to this plastic here, so we do need to be careful there. And where they mentioned to cut is right here for our arm receptacles, which does look to be pretty spot on. Now, you may also notice where your diode wiring will mount up goes in this small slot. So, it is gonna be crucial that you have that plug out of the way. It might make it a little bit more difficult to get your diodes all set up, but I think once this is all drawn in, it should look really clean. So, since I'm hitting on here, I'm gonna start cutting like I said, and then we should be able to draw this all the way back until everything can bolt up. And once we're happy with the cuts, we are gonna get everything put back in the reverse order that we took it off. And that's gonna include the two electrical connections, so make sure you plug those in. But yeah, from here you've taken it off before, so once you make your cuts, just put it all back together. (saw whirring) So, I got everything back in place and something I did notice I mentioned earlier, the diode wiring. This is one that I would wait, run your wires out and then hook up your six pole. And with that being said, I did have to trim so I went pretty high up here and just kind of cut that so we can still open it. You will need to do that. This doesn't stick out far enough and I did trim a little bit extra on the arms mostly because you wanna actually put these in place, make sure it can rotate and everything will pop out nice and easy. But overall, really happy with the finished product, having the mounting points really made it nice. So, at this point we're ready to hook everything up, get our vehicle in flat tow mode, and we're ready to hit the road. Now, hopefully this video is helpful in deciding whether or not this is gonna be the right base plate for you and if you're installing it hopefully is helpful in the process of that as well. Any feedback really helps us make our videos as best as possible for neighbors like you. With that being said, thanks for joining us for a look and installation of the Blue Ox Base Plate on a 2026 Chevrolet Tahoe.


Prompt service!
Great service
Fast shipping, good price, good product, easy install.
Delivered promptly!
Info for this part was:
At etrailer we provide the best information available about the products we sell. We take the quality of our information seriously so that you can get the right part the first time. Let us know if anything is missing or if you have any questions.





















Thank you! Your comment has been submitted successfully. You should be able to view your question/comment here within a few days.
Error submitting comment. Please try again momentarily.